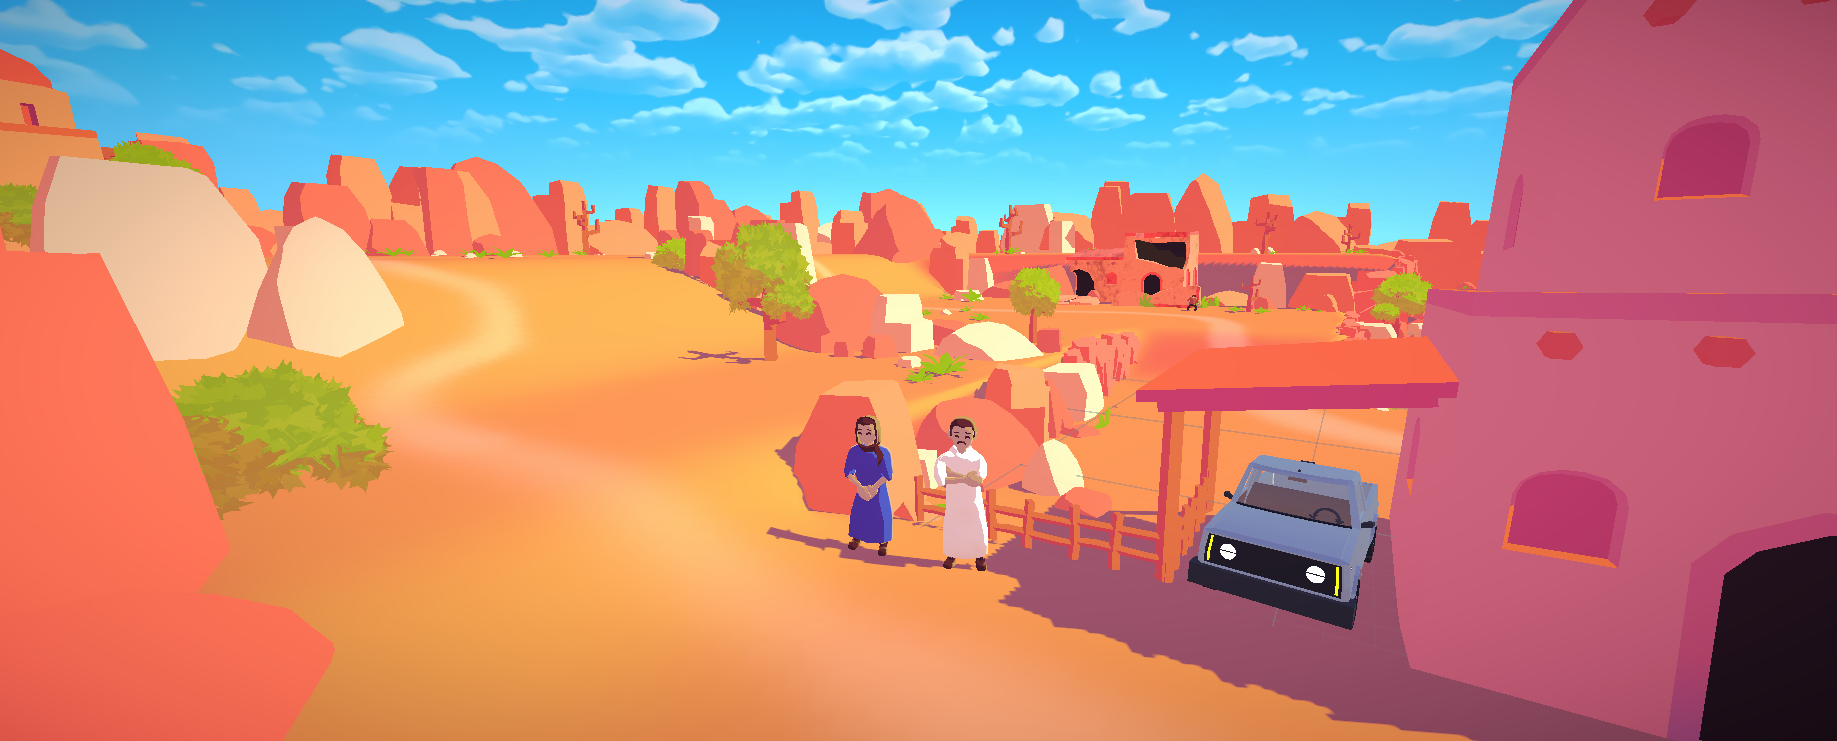
Development for Safety Road started in July 2025 and the game was published on the Google Play Store in November 2025, with iOS and Itch.io releases coming soon. The goal of this game is to provide an interactive and educational experience about the dangers of unexploded ordinances left in residential areas all over Iraq.
This project had a lot of unique challenges and a notable language barrier between myself and upper management. My responsibilities included level design, animation, player controls, visual polish, and lots of other odd jobs. It tested my ability to work with teams across culture, language, and time zones.
Level Design
Level design took up the bulk of my time spent developing Safety Road. We were under a strict deadline of only a few months, so I had to find a way to quickly put levels together. What we ended up doing was setting up 2 level "templates" and rearranged the obstacles for each individual scenario. The result was 6 levels that feel different, but utilize the same terrain.
Earliest prototype
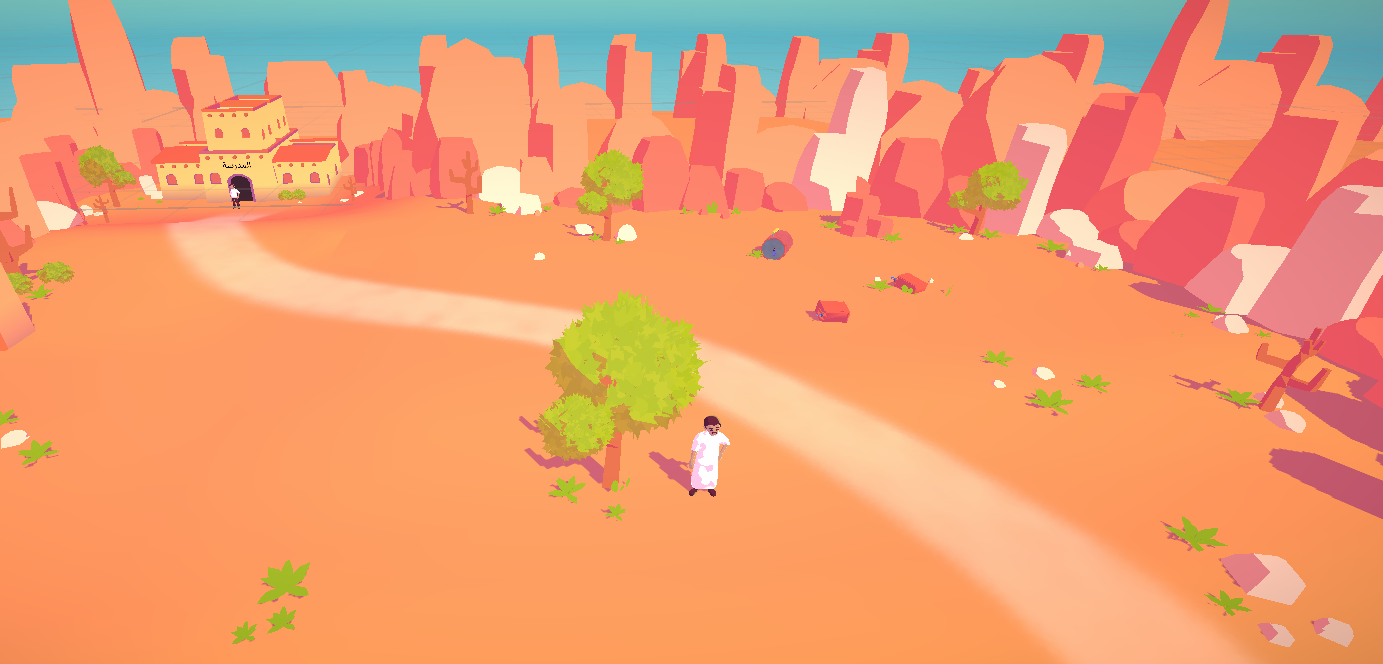
The first level prototype I submitted got rejected for appearing "too American," with tightly packed houses surrounded by fences. Turns out American style suburbs don't exist in Iraq, and I had to do some research on what an Iraqi neighborhood actually looks like.

The level design process
These are the steps I followed:
- Concept art
- Block out
- Decorate and refine.
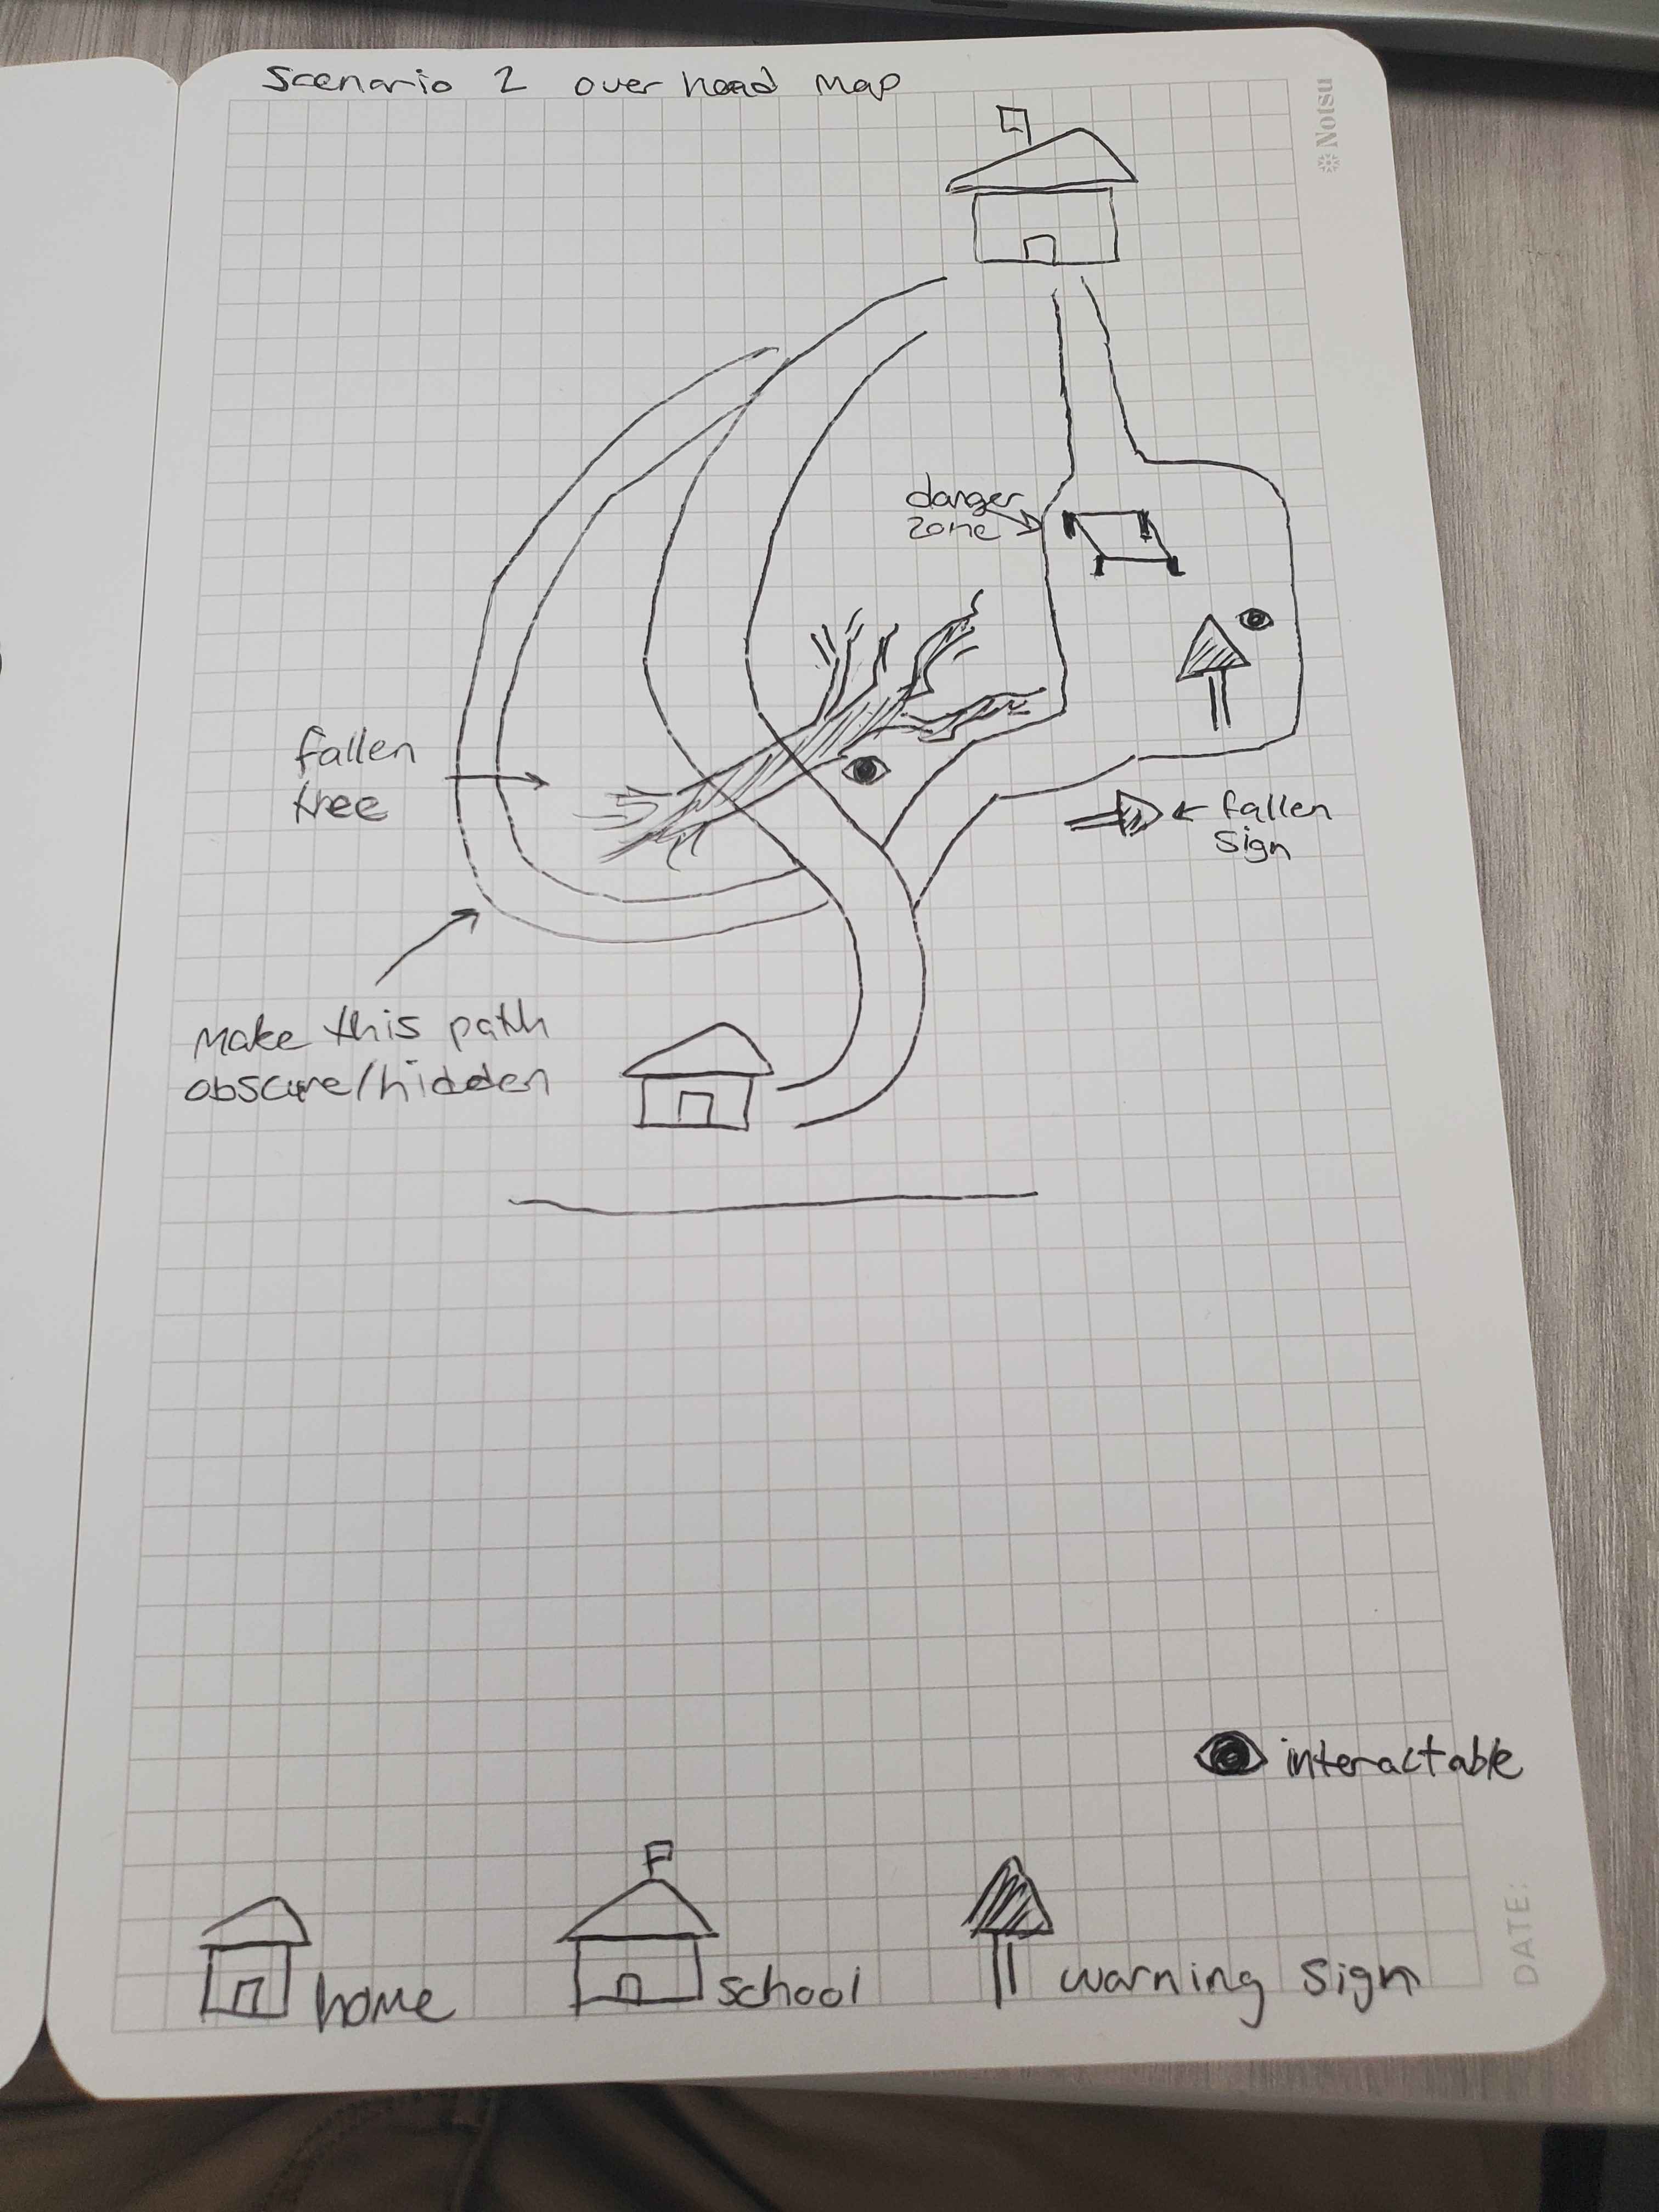
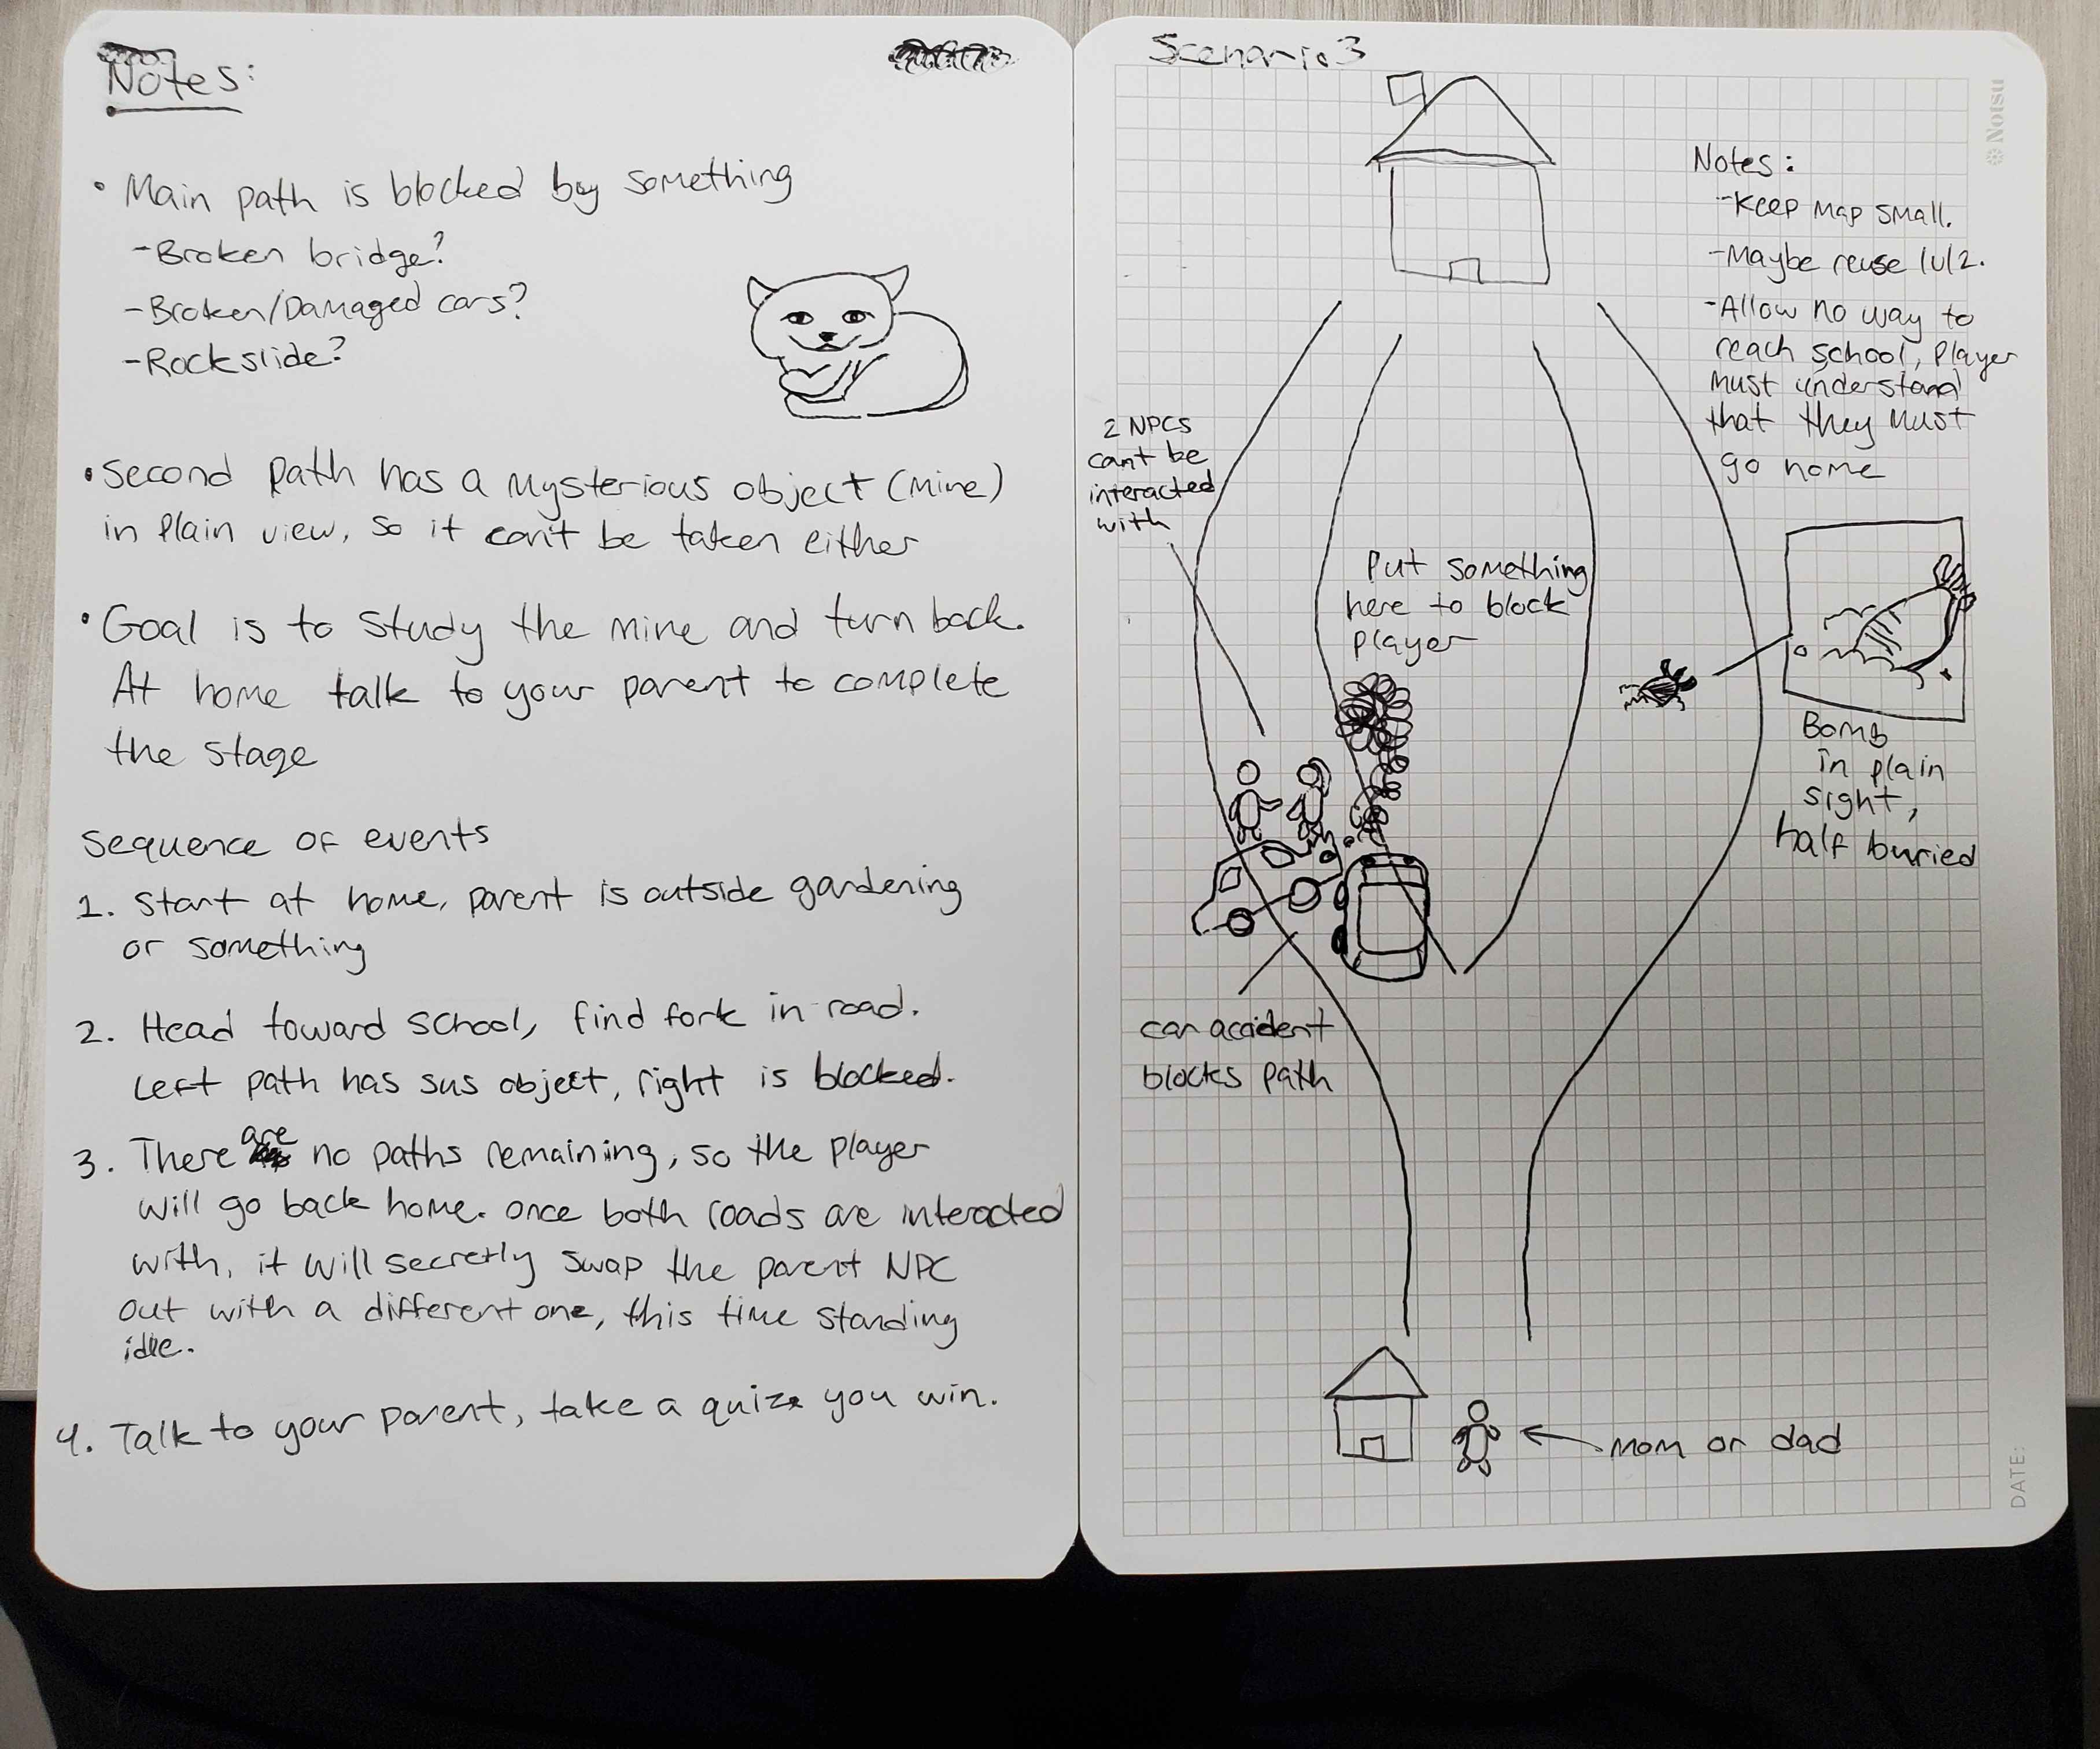
For the concept art phase, I would draw a map of the scenario out on paper, creating a general guideline for the player's path and obstacles they would encounter. Once that concept was approved, I'd start the block out phase.
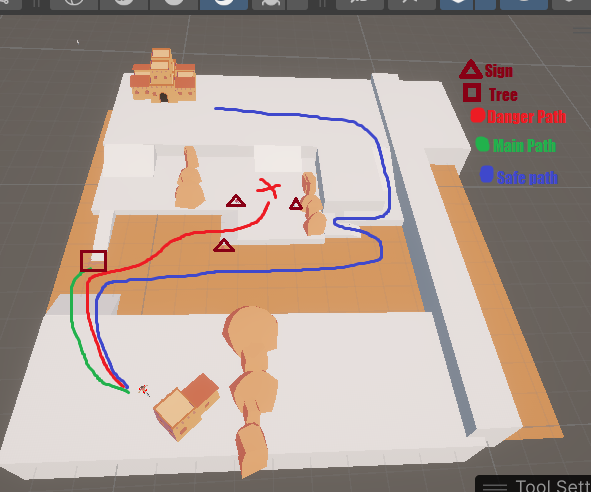
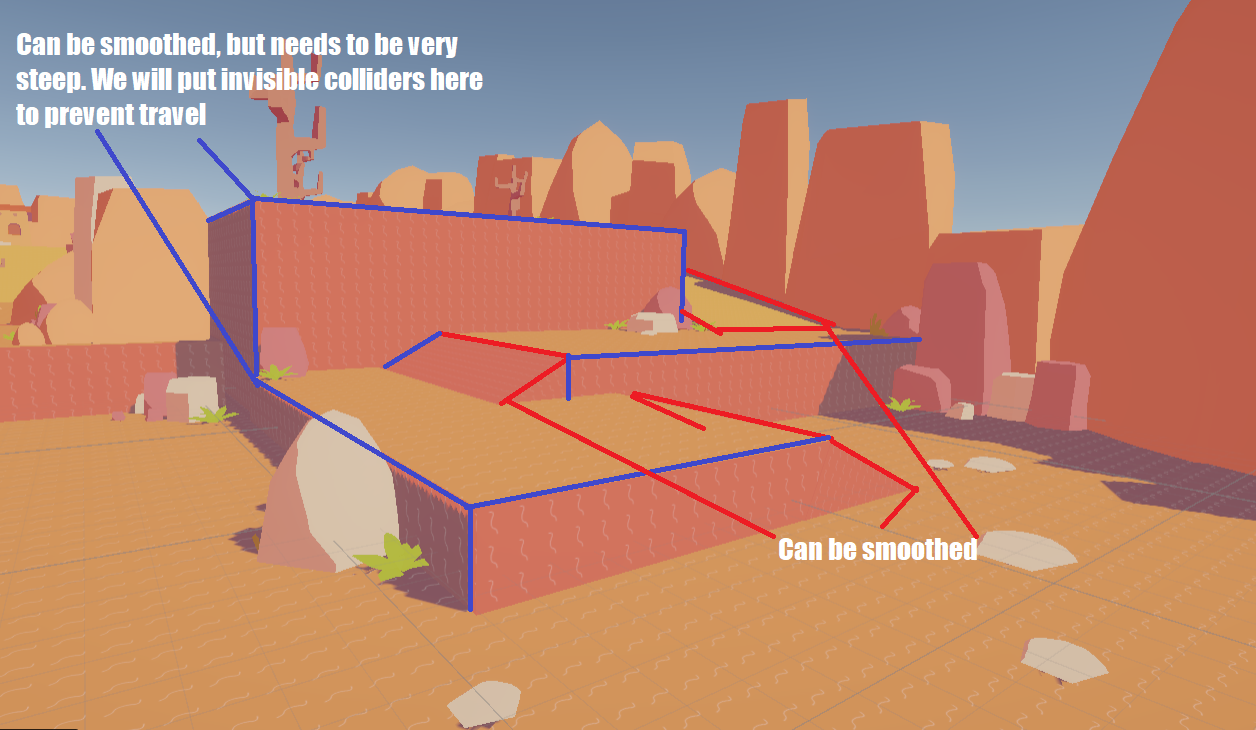
The block out phase involved using one of our two level terrain prefabs to create a rough draft of the level's layout. This is typically where I'd start placing buildings, NPCs, the Player, the explosives, and other road obstacles. I'd send screenshots of areas I wanted to be smoothed out by Alan during his modeling process. Once he sent me the smoothed terrain and approved the layout, I'd move on to the decoration phase.
For the decoration phase, I tried to follow 3 rules:
1: Decorations should look natural.
2: Decorations should naturally guide the player's eyes.
3: Decorations should never distract the player from explosives
I used prefab models that Alan provided and spread them around the map. Placing objects one at a time proved to be too time slow, so I ended up creating prefab "bundles" of decorations that I could place around the map and adjust as needed. This was a huge time saver and typically looked more natural than having each decoration be presented by itself.
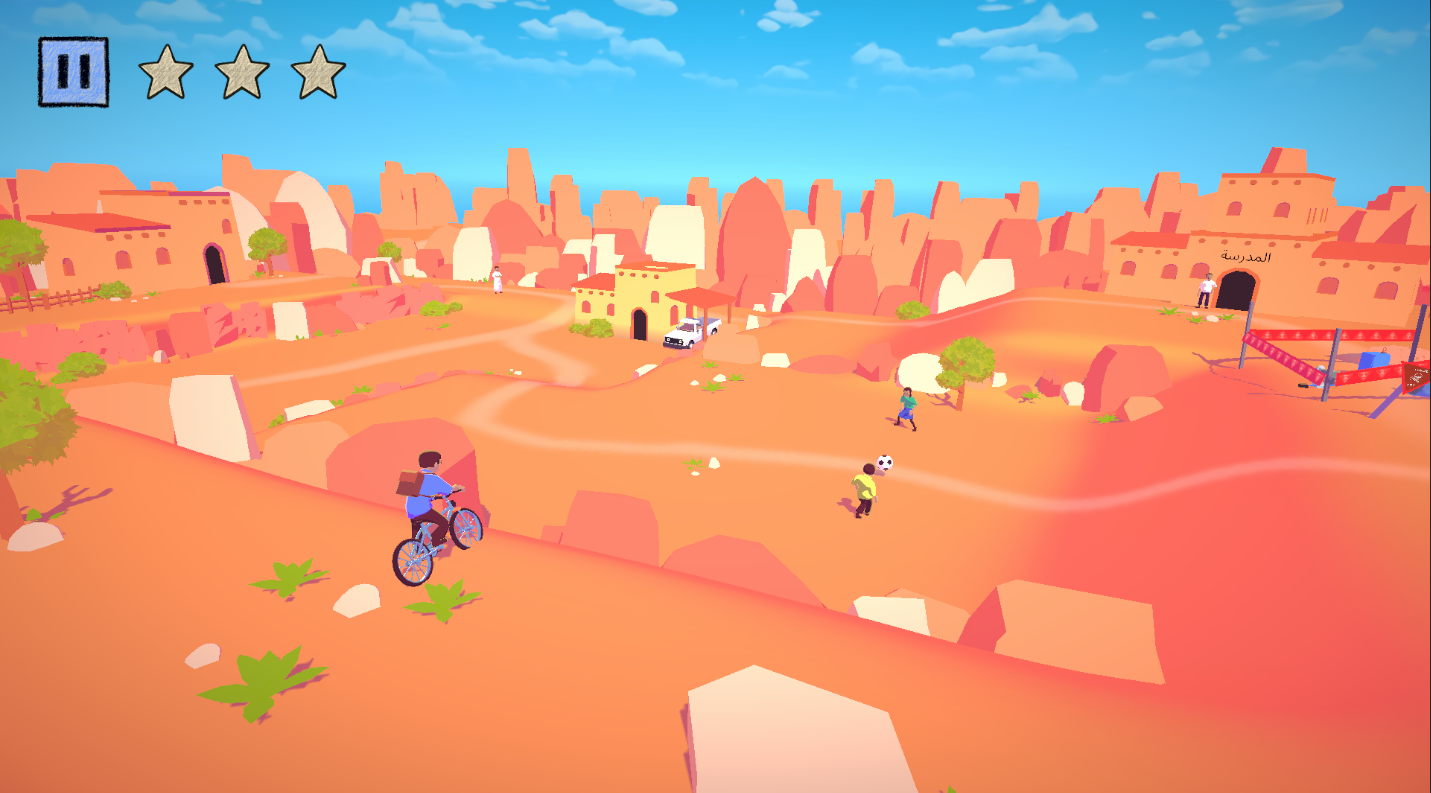
Whenever we had the player take a detour that was off the beaten path, I would guide the player in that direction by using trails of rocks or highlighted path entrances with brightly colored grass. This helped players figure out where to go without needing to be directly told.
Despite the game being Arabic and Kurdish, English speaking playtesters were able to complete the levels just by studying the level layout. That was a sign that the level was a success!
The final refinement stage typically occurred after we received feedback from management and playtesters. This usually involved moving NPCs around or covering up spots where you could see outside of the map.
Player Controls
Being an educational game, the controls needed to be simple and intuitive in order to avoid distracting from the educational material. The player character rides a bike in this game, but that doesn't mean we could let players perform tricks or anything like that. My two objectives were:
- Design controls that conveyed the weight and inertia of riding a real bike.
- Have the controls be "invisible" to avoid distracting from the material at hand.
When the player first starts moving, it takes a few seconds for the bike to build up momentum and reach top speed. The faster the bike moves, the harder it is to steer it. This provides some weight and realism to the controls, while still allowing the player to easily navigate at lower speeds.
The bike is controlled entirely through a single joystick. Once you start moving in a direction, you simply steer to the left or right. This works excellently on mobile devices and allows players to put more focus into the learning material, rather than grappling with the controls.
Early on in the project, we toyed with more complicated bike interactions, like moving slower on rough terrain or jumping over small ledges. However, we found that playtesters would get distracted by these interactions. When they started moving slower, they thought something was wrong with the bike. When they noticed they could jump off of small cliffs, they tried to find ways to skip road obstacles or important NPCs. We decided to cut these features, keeping players focused on the important stuff.
Animation and AI
I was in charge of the animation and character AI for this game. Unlike Ratslayer, nobody in this game would be doing any sort of flips or roundhouse kicks, so animation was a little easier to implement this time around. For NPC AI, I created a system for dialog sequences that can be edited entirely within the Unity editor. This system allowed us to quickly set up dialog lines, camera angles, and triggers for NPCs to begin following you.
Player Animation
The player uses a combination of procedural animation and hand made animations. Using Unity's Animation Rigging package, I created inverse kinematic targets on the bike's peddles and handlebars. This kept the player's hands and feet glued to the correct positions on the bike. The player character also plays a looping "breathing" animation and leans forward when the bike is accelerating.
The bike leans left or right to match the player's steering direction. If the player doesn't move for a few seconds, the character leans to their bike to the side and puts their foot on the ground for balance. All of these animation systems combine to create very natural looking movement without requiring a large set of hand-crafted animations.
NPC Animation and AI
This game features two types of NPCs: Idle NPCs and Follower NPCs. Idle NPCs required speaking, pointing, and (you guessed it) idle animations. Follower NPCs needed animation cycles for walking and running in addition to animations shared with idle NPCs. Follower NPCs also needed special AI in order to follow the player to safe locations.
Having an NPC follow you is simple on the surface, but in practice there were a lot of kinks to work out. At first, followers would match the player's movement exactly, so they would begin running as soon as the player would touch the joystick. This looked unnatural, so I created a system where the follower tries to remain within a set distance from the player, but won't begin following until the player gets far enough away. This system is known as "hysteresis" and mimics how humans tend to move in groups in real life.
I also had to find a way to keep the Follower NPCs attached to the ground. I tried applying gravity to the NPC's rigidbody, but this resulted in the locomotion looking "jittery" because the physics were fighting with the movement script. It also allowed the player to push NPCs around, which distracted playtesters. My solution to this was to have the NPCs be kinematic, meaning they can only be moved via script, which looked nice and smooth, but caused them to float above the ground. I then wrote a function that cast a ray from the bottom of the NPC that looked for the ground and then moved the NPC to ground level.
Improving our workflow
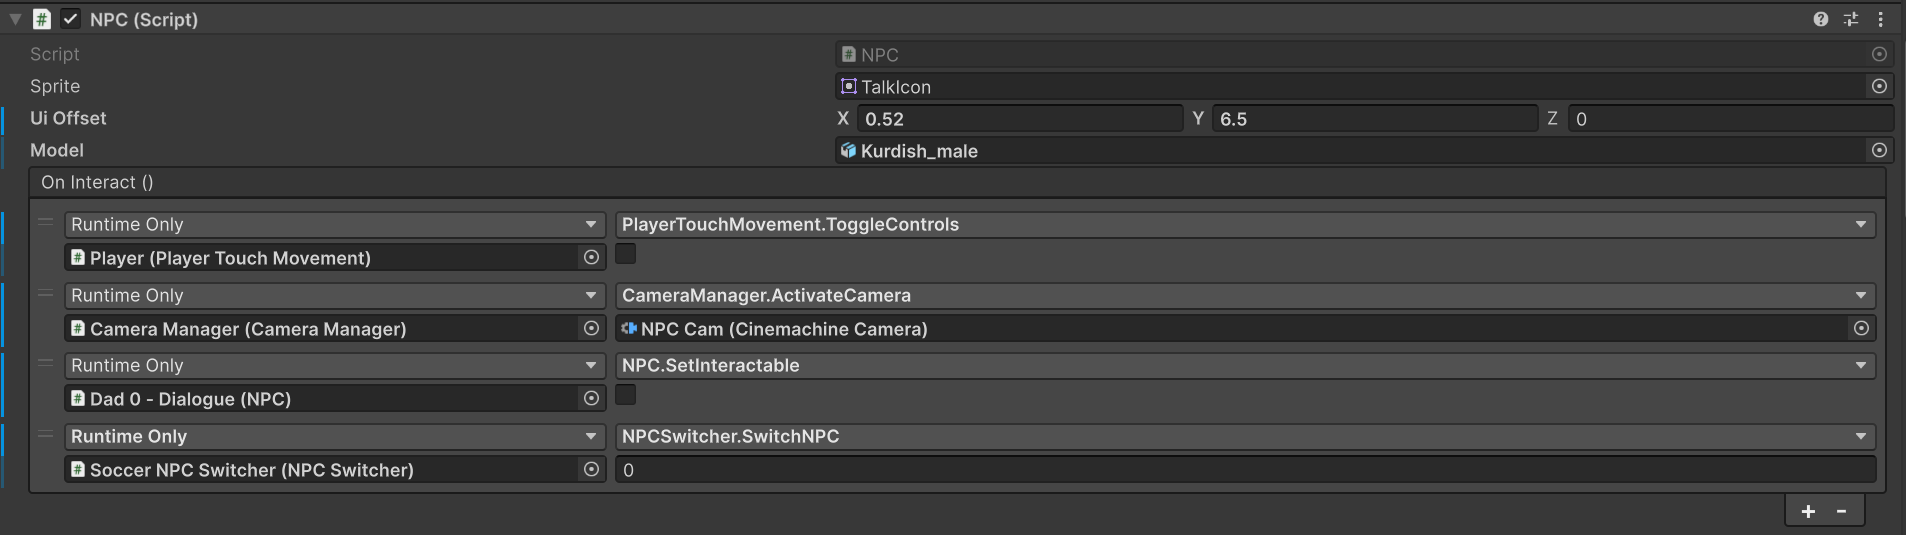
When setting up the dialog for our NPCs, I recognized an opportunity to optimize our workflow. Each NPC needed the ability to speak to the player, which involved animation swapping, dynamic camera angles, and audio narrations. Rather than setting up a script for each NPC, I created a system that allowed us to set all of these things up within Unity's editor.
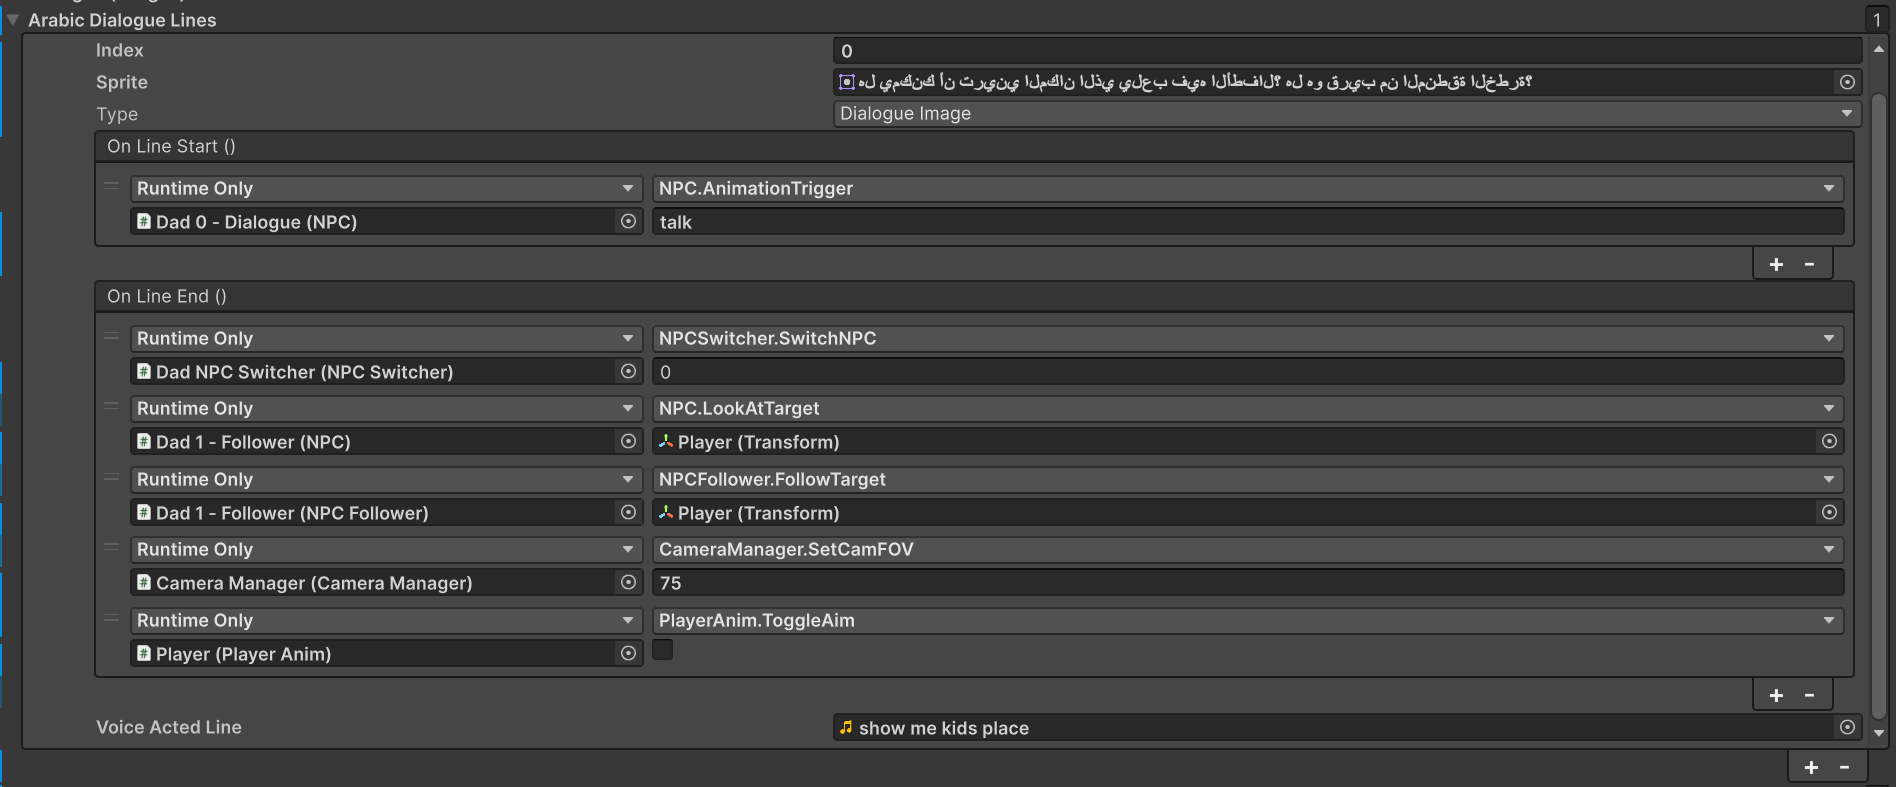
Each NPC contained 3 triggers: OnInteract(), OnLineStart(), and OnLineEnd().
Within these triggers, you could assign things like animation transitions, Cinemachine Camera transitions, voiced dialog clips, reward level completion stars, anything you needed. This saved our team hours of monotonous work.
As NPCs grew to be more complicated, we started to notice the limitations of this system. It was easy to get confused with the large list of commands within a single trigger and it didn't support NPCs that would switch between different states, like idle and following. For a much larger project, a more robust set of tools would be necessary. But for a project and a team of this size, this system was a lifesaver.
Polish and Refinement
As Alan and I received feedback from MAG, I had to make a lot of small tweaks to the level layouts and player controls. I also spent some time adding little refinements to presentation, like animating the UI and adding a VFX dust trail to the back of the player's bike.
A major refinement we added late in development was camera controls. Initially, we thought that camera controls would distract the player from road hazards, but MAG and the playtesters consistently requested the ability to control the camera.
Thankfully, Cinemachine comes packaged with tools that prevent the camera from clipping inside of the environment and avoid obstacles that would obscure the view of the player character. The downside is that it revealed many places where you could see outside the edges of the map. I ended up spending a day or two just covering up holes in our geometry.
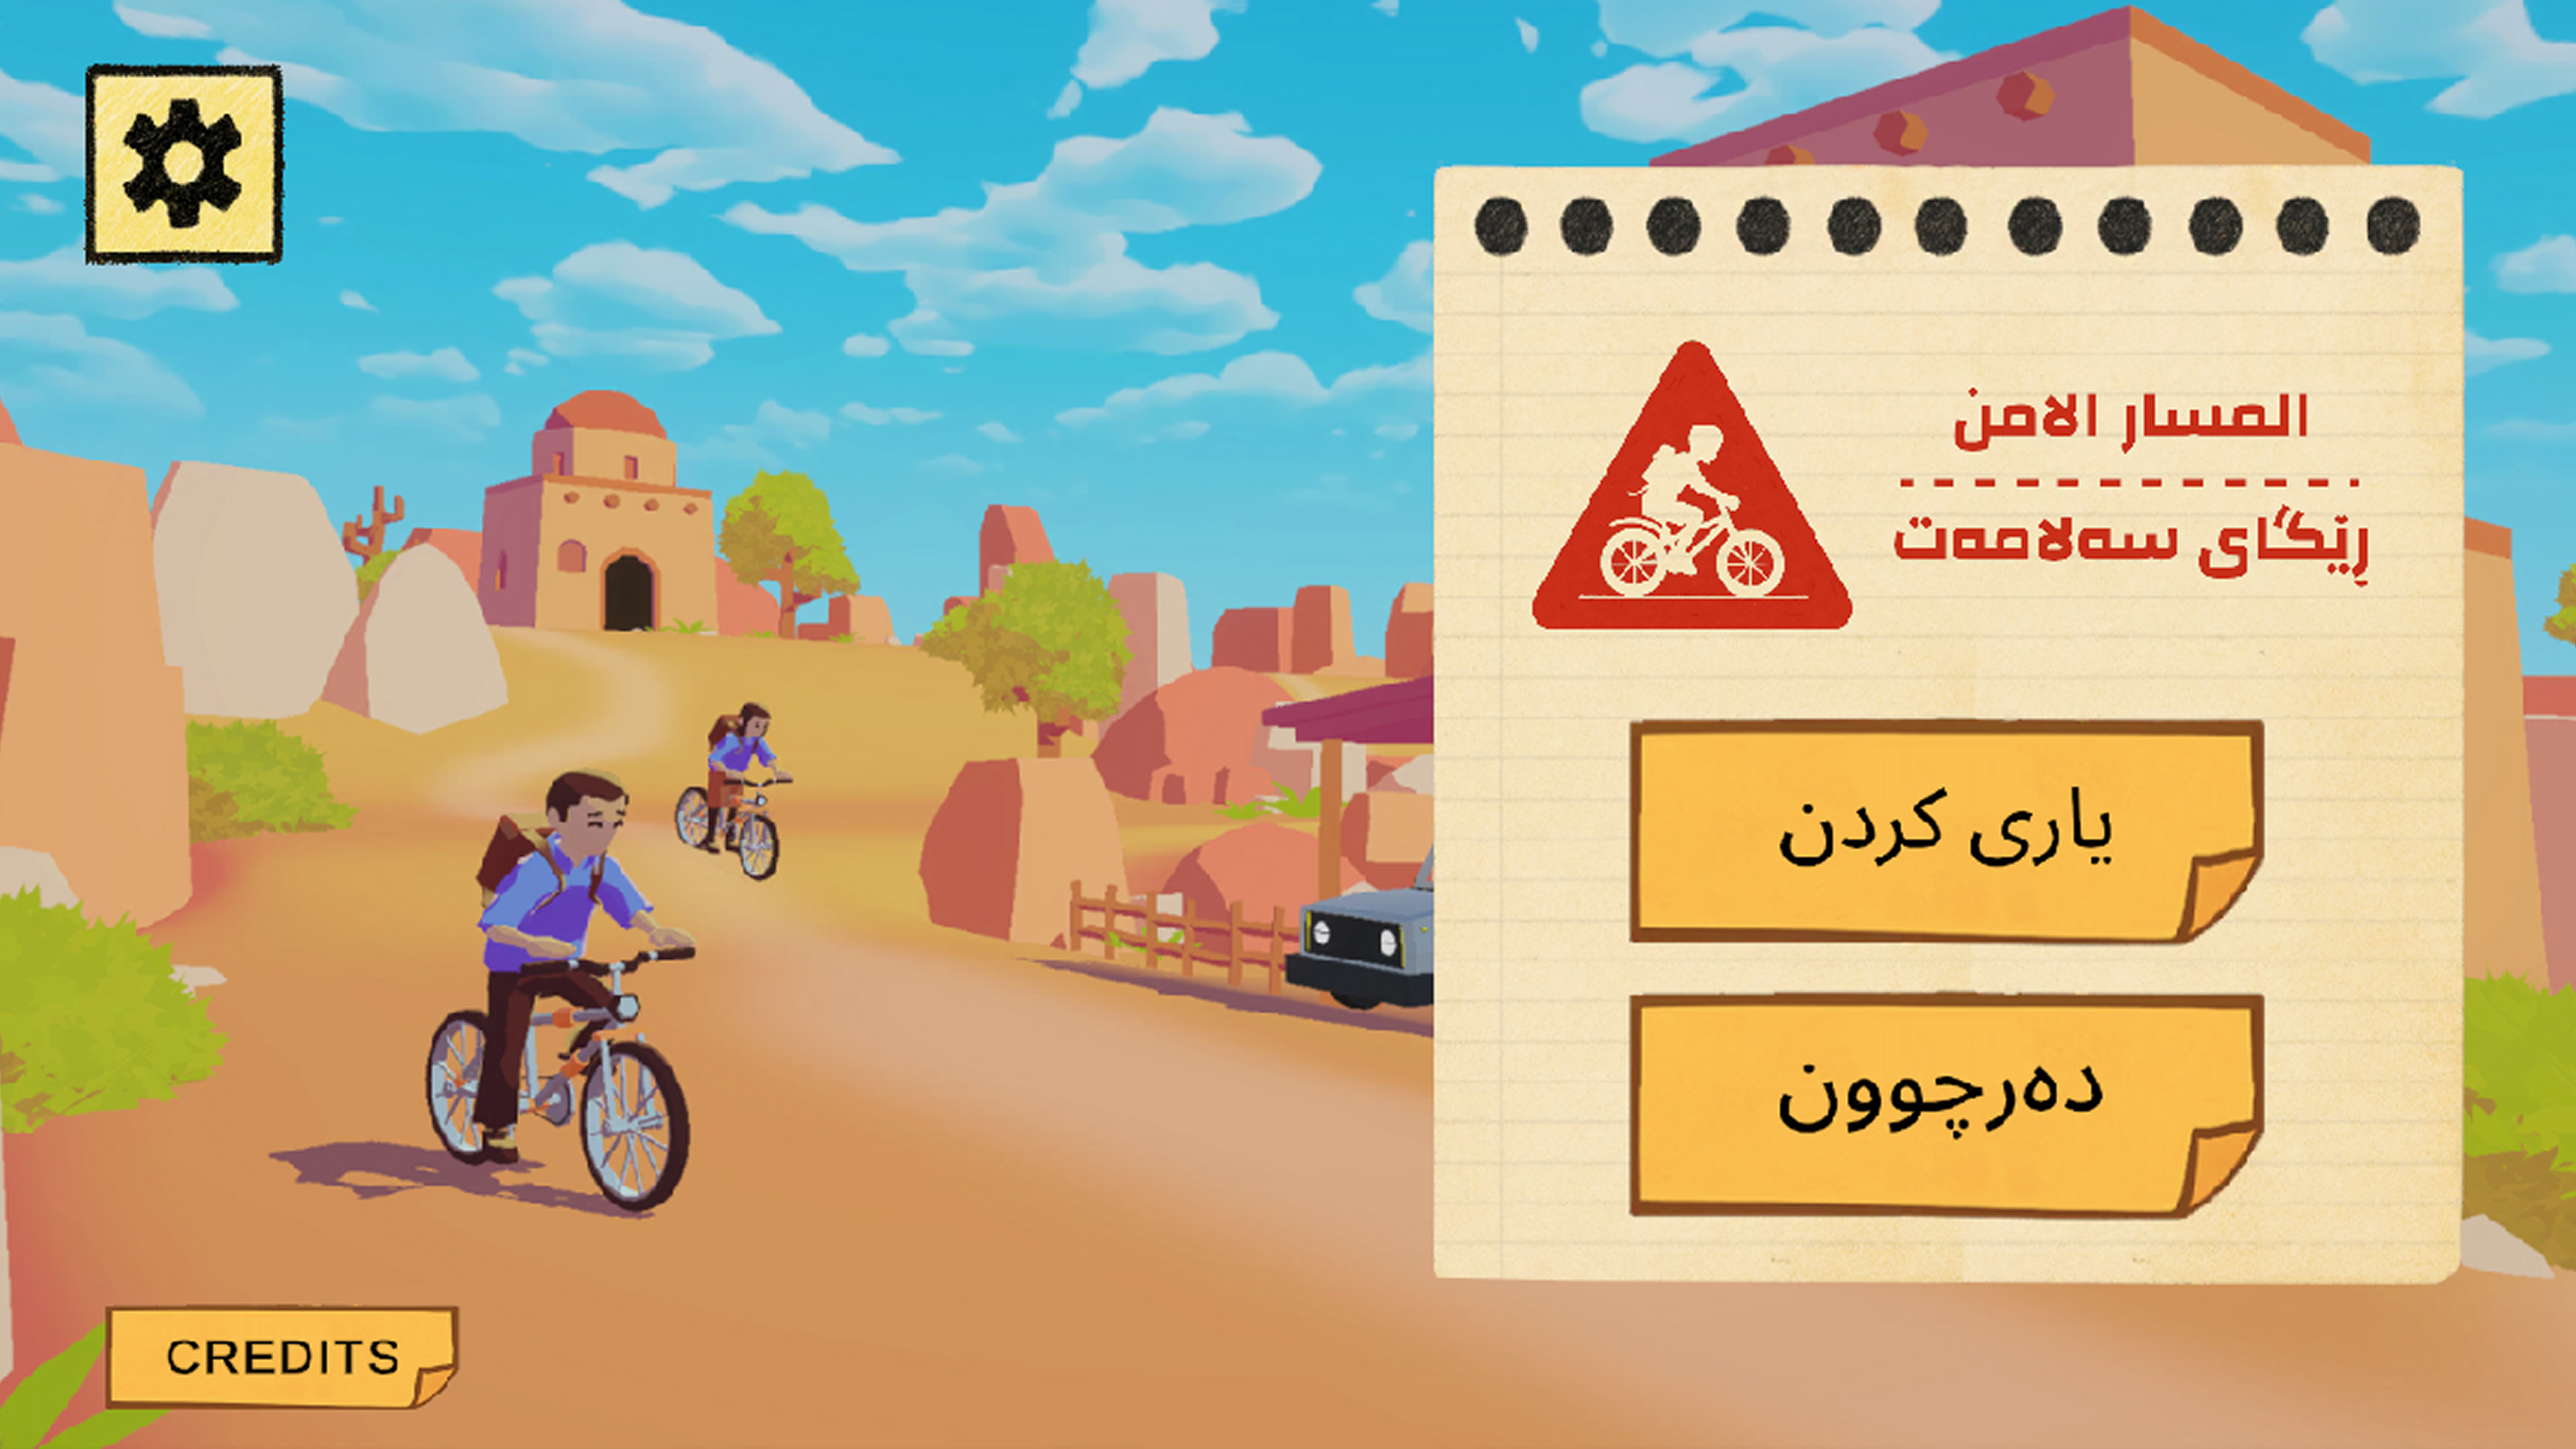
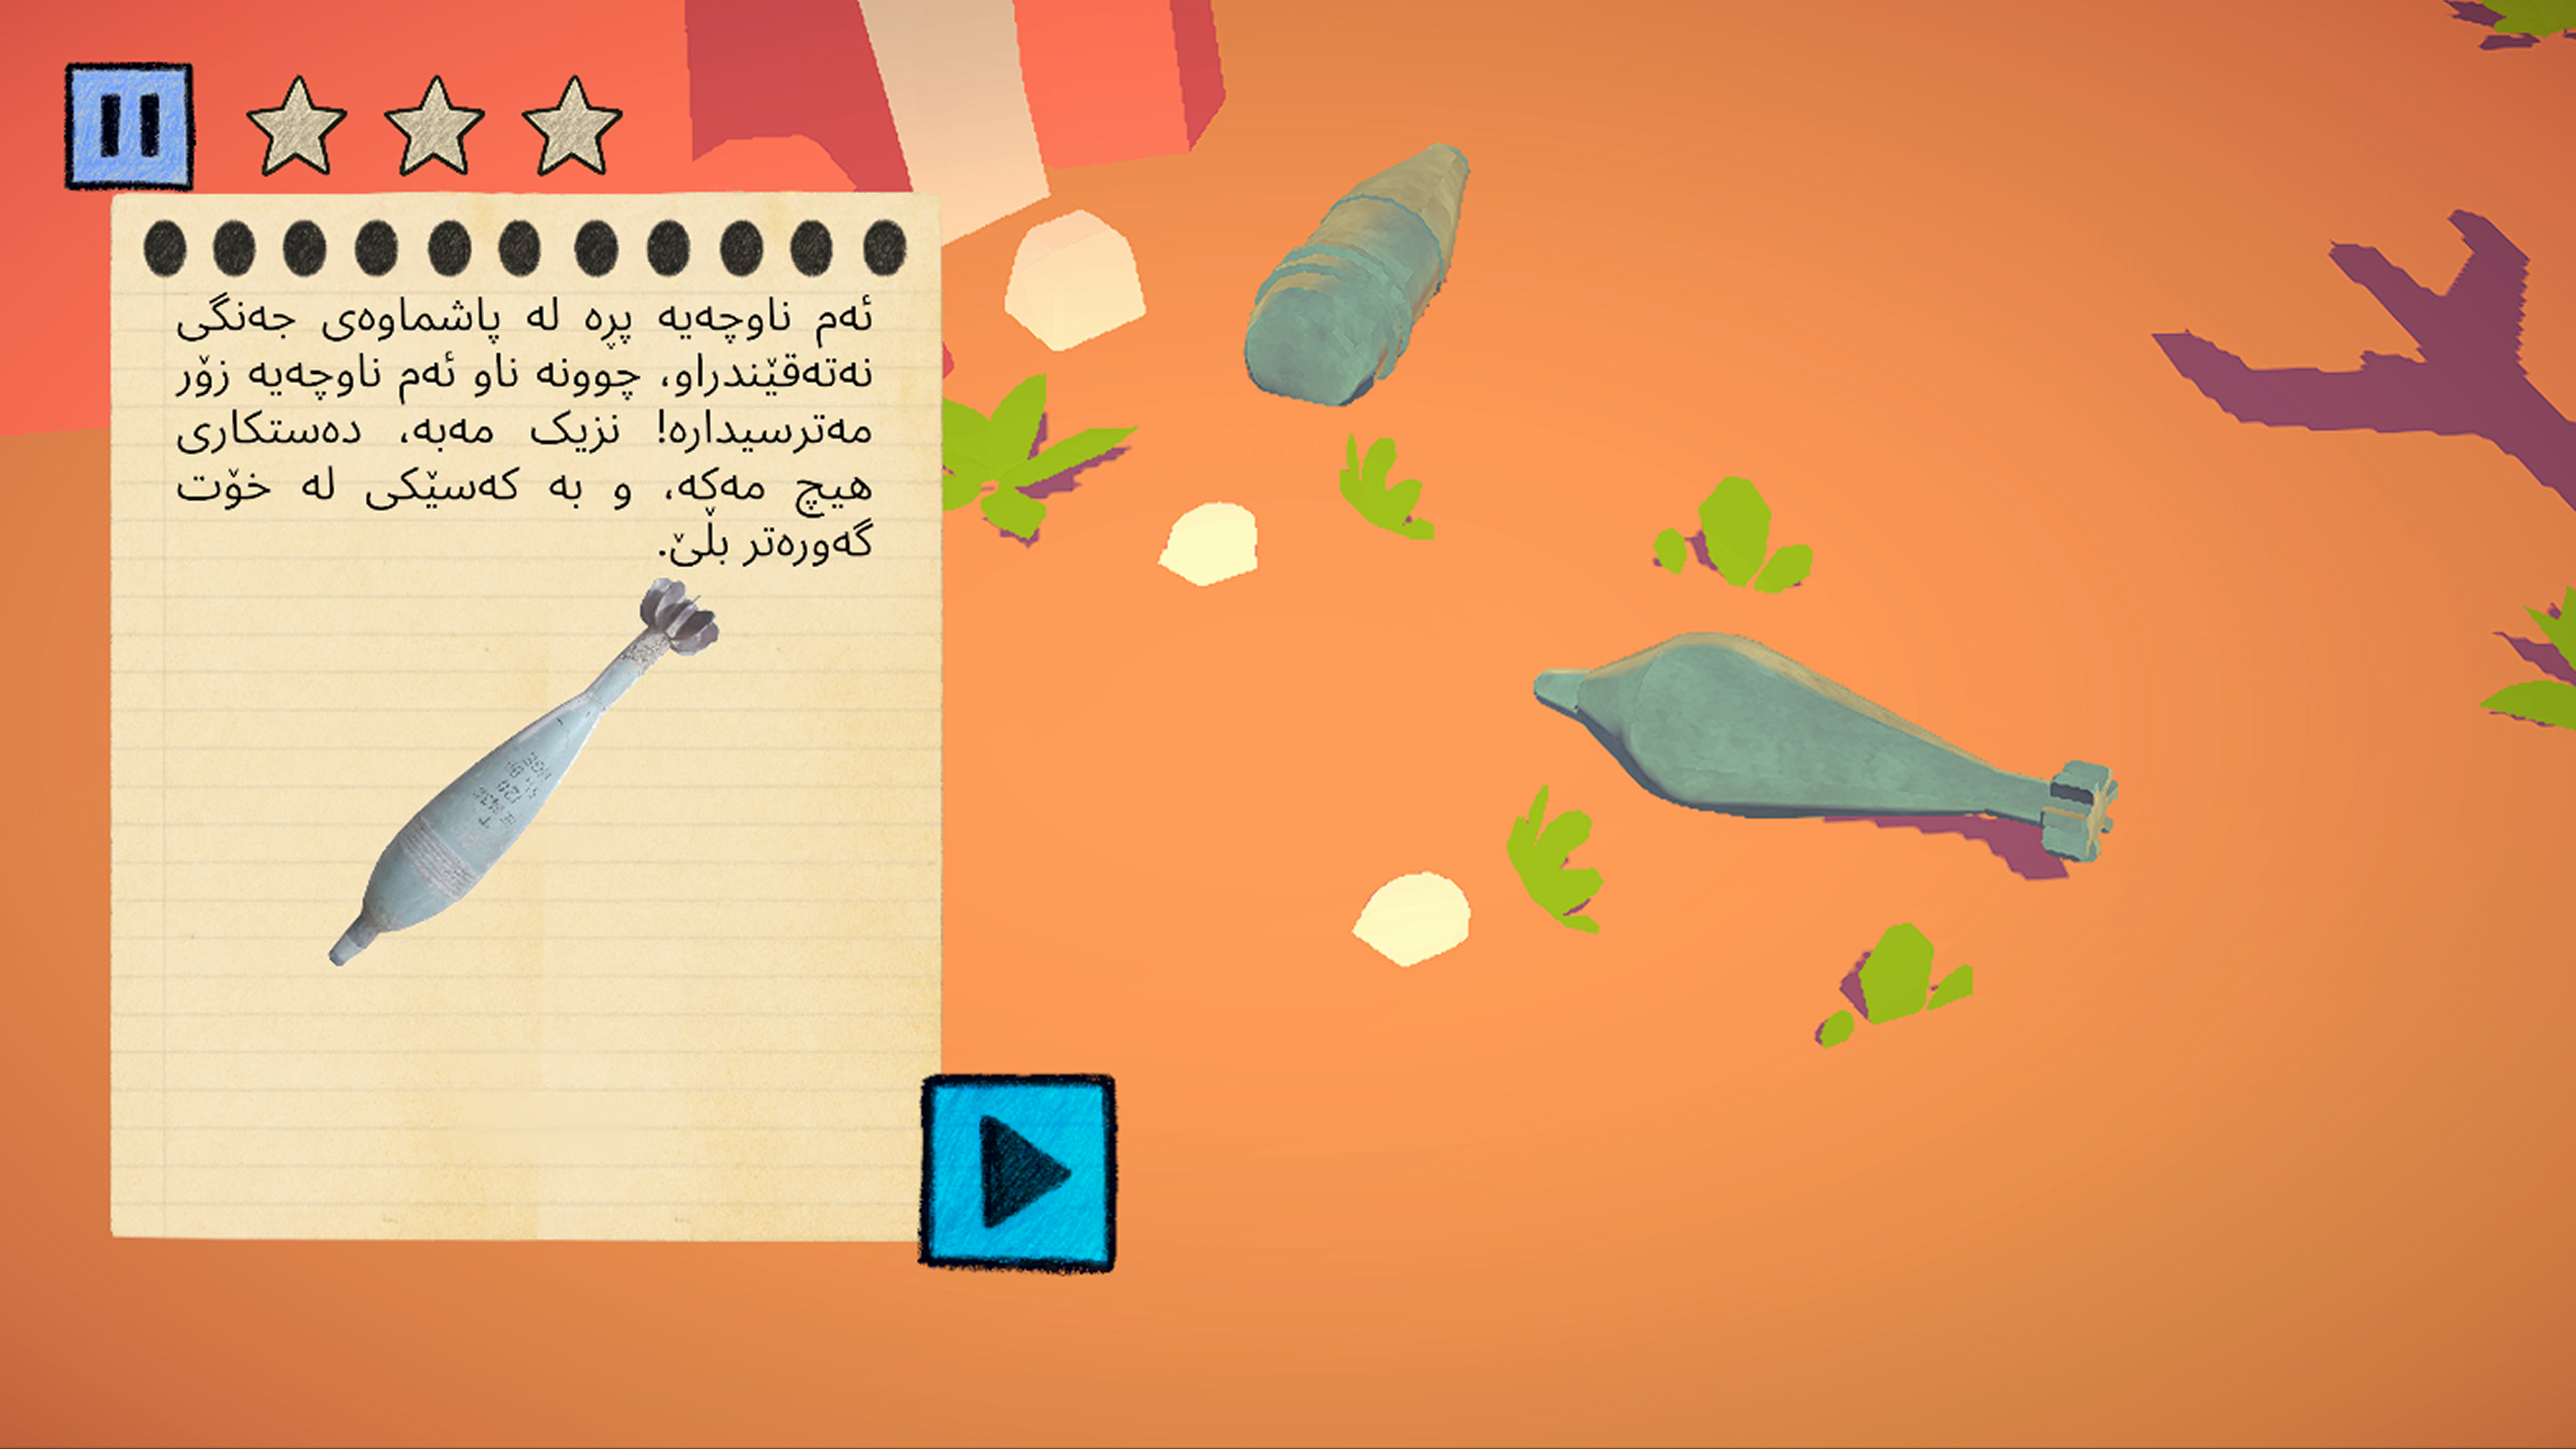
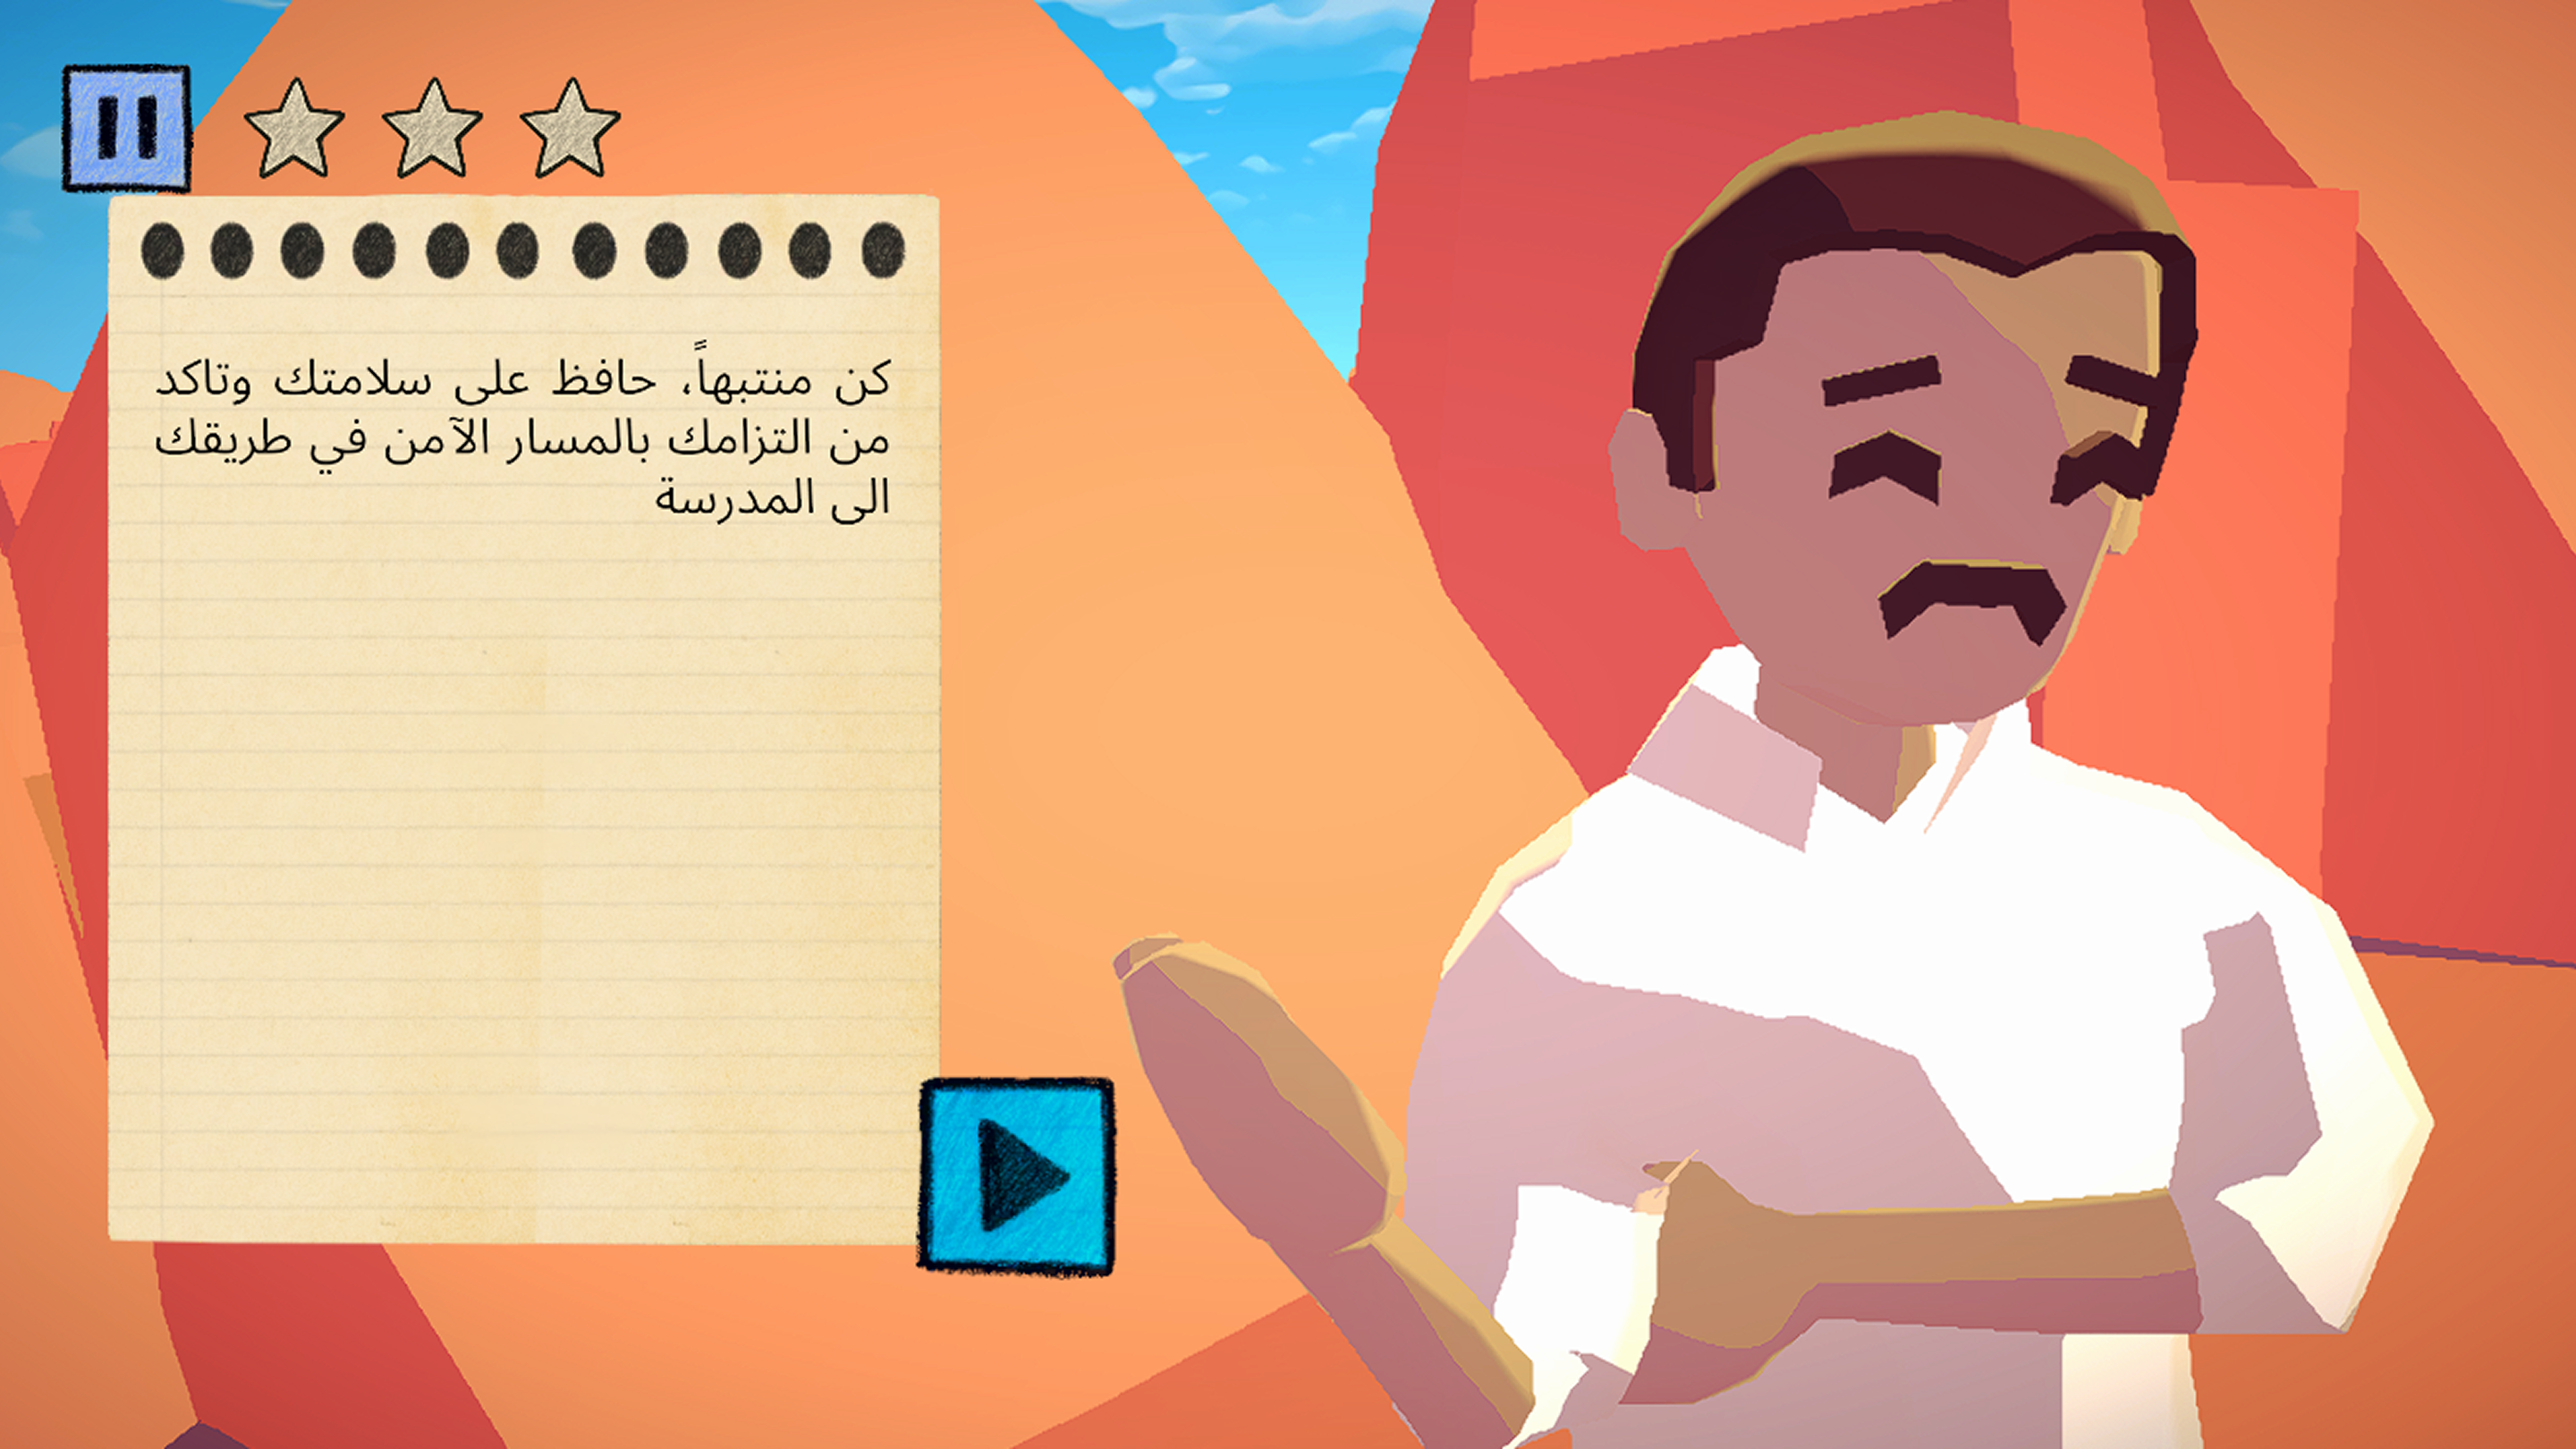
Another refinement I added to the game was UI animations. The main menu and in-game dialog UI uses a skeuomorphic design, evoking a student's notebook - the menu panels and buttons being scraps of notepaper and the text appearing hand-written. To match that design, I animated the panels to slide in and out of view, as if the player is sorting through different pieces of paper on their desk. I made sure all panels are synced up with each other so the transitions look smooth and natural.
Links
Trailer
Back to Projects